 Copyright © Michael Richmond.
This work is licensed under a Creative Commons License.
Copyright © Michael Richmond.
This work is licensed under a Creative Commons License.
Back in the "old days", planning an observing run took a lot of work. One needed an atlas of the sky, a set of catalogs of astronomical sources, and several tables made specially for each observatory which would convert one set of quantities (such as Right Ascension, Declination and time) into another set (such as airmass, altitude and azimuth). It was a pain.
But in the last fifteen years, cheap computers have made this all very easy. One can purchase for under $100 a program which will show the positions of millions of objects in the sky as seen from any location, and at any time. If you have a list of targets, you can figure out which ones to observe on any given night, and when, in just minutes.
Here at RIT, we have a choice of platforms and programs. Under Windows, we can use a program called Sky Map Pro. It is installed on the computers in the first-floor computer labs in the College of Science, on the computers in the Physics labs, and on the computer in the dome at the RIT Observatory. Our copies are version 5, which is far behind the current version. Visit the Sky Map Software home page for more information on their products and pricing. Note that this program can not only display a map of the sky, but also control common telescope mounts so that they point at objects of interest.
On the Mac computers (and on my own Linux machines), one can use a program called XEphem. You can purchase versions of this program which run under Windows, MacOS X, and Unix operating systems. I use it because I can download for free the source code for my Linux system. Free is good.
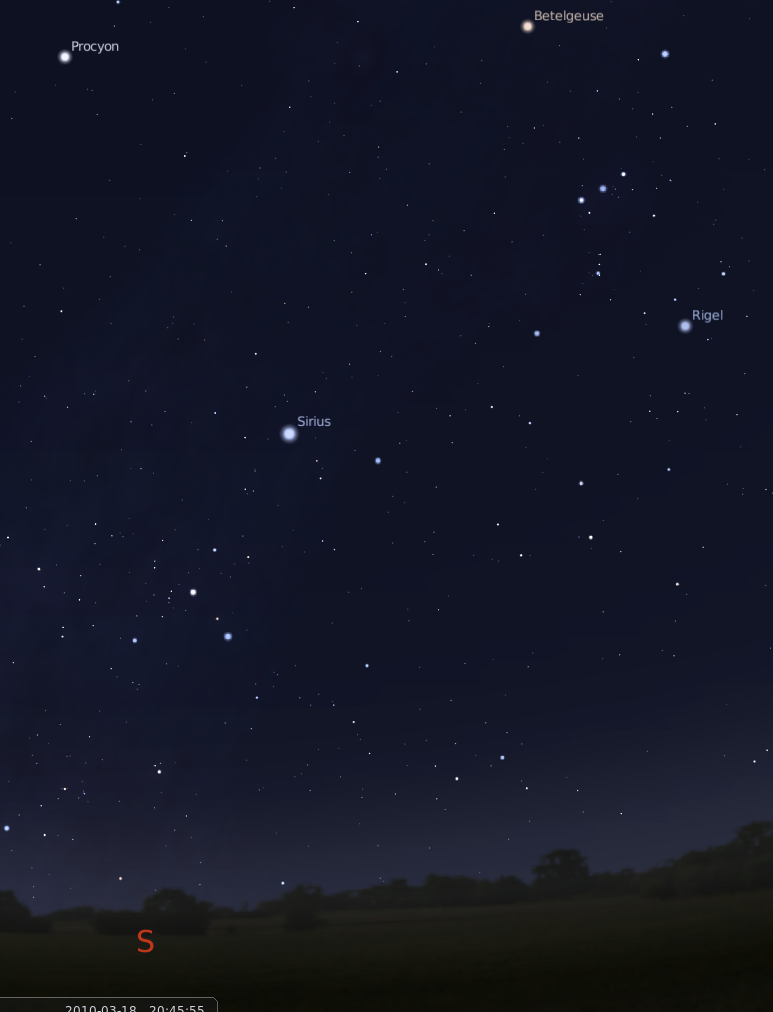
Another good, free planetarium program -- though it requires quite a bit of CPU and graphics power -- is Stellarium. It runs under most major operating systems. If you happen to be using Mac OS X, then you might find it quick and easy to run Stellarium by copying this .dmg file to your desktop and then clicking on the "Stellarium" icon.
In order to enable a tool which measures angular separations between objects, follow these instructions -- thanks to Mr. Acresti:It can produce very pretty and very realistic views of the night sky, like this:To use the tool, select the little angle-icon from the lower menu (it should be just to the right of the "Full screen" button) and click-drag anywhere in the sky.
- Go to the Configure menu (on the right slide-out menu) or just hit F2 (Mac users: fn-F2)
- Select the "Plugins" tab.
- Select the "Angle Measure" plugin from the plugins list.
- Check the "Load at startup" checkbox.
- Restart Stellarium
Below are a set of possible targets for your observing projects this quarter. They fall into several categories:
For two of these targets -- plus an additional target of your own choice -- please use the XEphem and/or Stellarium software (perhaps with help from SIMBAD and NED ) to do the following:
Copyright © Michael Richmond.
This work is licensed under a Creative Commons License.