On the night of May 08/09, 2022, under good conditions, I first attached our new ZWO ASI6200MM camera to the 12-inch telescope and took pictures of the sky. This camera uses a CMOS sensor, not a CCD. I'll be continuing to run tests with it for the next week or two.
I took the camera and other equipment out of its boxes and examined it. One can attach a 2-inch slidetube to the camera body using the M54M-M58F 2.1L adapter. However, in order to focus light onto the sensor at _roughly_ the same location as the ATIK CCD (with its filterwheel), one must move the camera back considerably. On this night, I used a Celestron 2-inch extension adapter placed between the camera and telescope. The adapter holds the camera via a pair of setscrews, which do NOT have any indentation to help them grip the camera. That's not a good long-term solution.
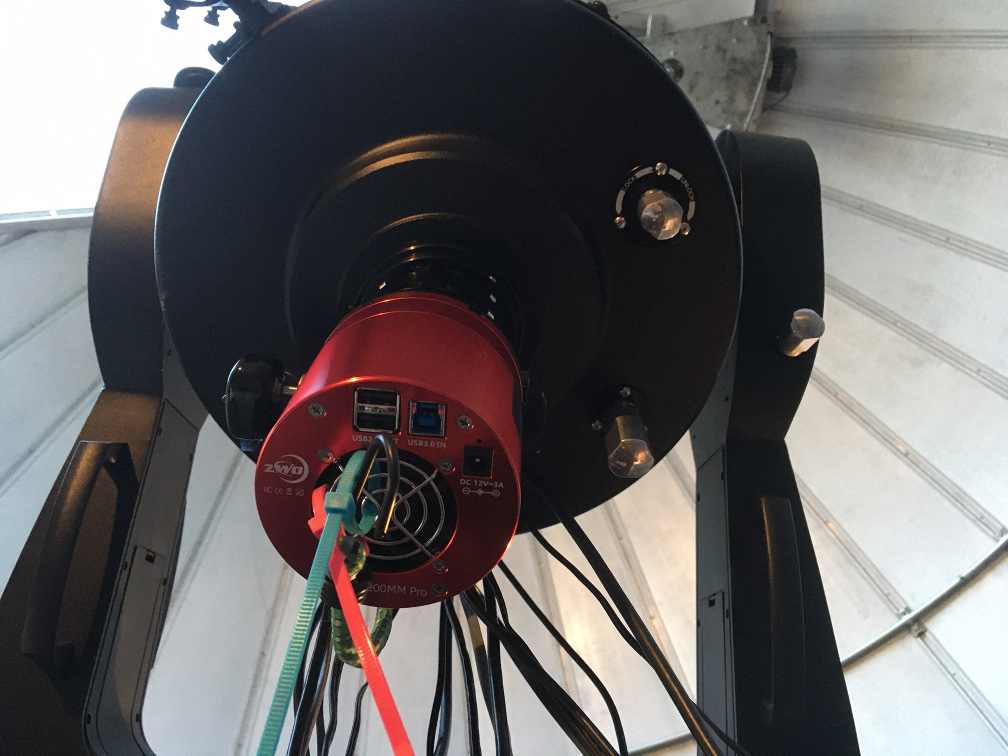
In order to achieve the standard image orientation, North up and East left on the MaximDL screen, one should mount the camera as shown in the picture below. When one looks up at the back of the camera,
I examined the filterwheel. The Johnson-Cousins filters have not yet been shipped to us, but we do have a set of RGB filters. I haven't put them into the filterwheel yet. The filterwheel can connect to the same M54M-M48F-2 adapter, which allows it to attach to the telescope's focuser. However, since I have only one of these adapters, there is apparently no way to then connect the camera to the "back" side of the filterwheel. It appears that we might use an M54M-M54M adapter to do this. I must investigate further.
The ZWO camera has different power requirements than the ATIK camera.
So, I added the ZWO camera's AC-DC adapter to the set of items which rest on the base of the Meade telescope's wedge. Its cable is just long enough to go up over the strain-relief handle and back to the camera.
On the other hand, we CAN re-use one item: the USB cable which carries the signal from the ATIK camera to the computer will work just as well with the ZWO camera. There is no need to add another USB camera to the mix. Good.
I installed the following software onto the computer inside the dome (cos-dome01).
One can set up MaximDL to use the new camera by using the Camera Control tab and then
  Setup Camera ->
     ASCOM ->
        Advanced ->
           ASI Camera(1) ->
              ZWO ASI6200MM Pro (ID0)
              Gain = 100
The choice of Gain value is simply the default. I haven't fiddled with it yet.
After taking a few test pictures, I verified that the MaximDL settings were working well. I then saved the configuration as mwr_zwo_noefw_may2022.
Binning the camera 4x4 produces images which are 2394 x 1597 pixels. Each raw 16-bit integer FITS image occupies 7.65 MBytes, a bit larger than the ATIK's 2x2-binned images (which are 2003 x 1335 and take up 5.35 MBytes). MaximDL can download the 4x4-binned images from the new camera in about 7 seconds.
Before processing images from this camera with XVista , I first divided all raw pixel values by 2, as usual. From this point on, I'll refer to the resulting pixel values as "counts".
The main setup was:
Notes from the night:
Running at a temperature of -15 C, this camera produces very uniform dark images. Below is a median of 20 dark images, each 30 seconds in length. The color scale runs from black at 245 counts to white at 255 counts.

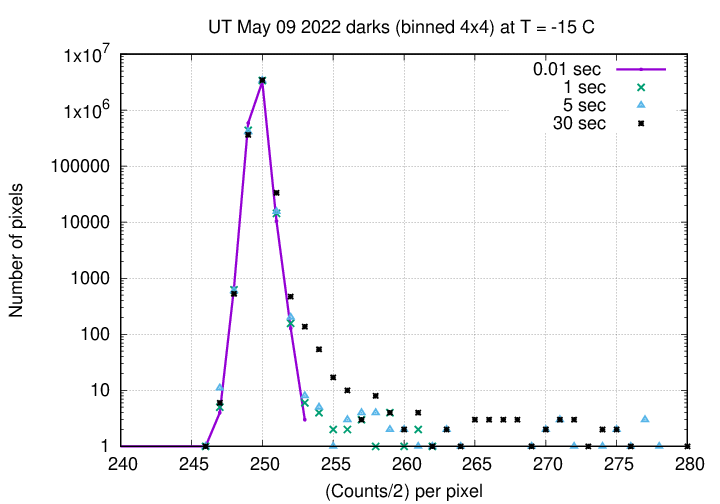
There is very little change in the dark frames with exposure time. Below is a comparison of the histograms of pixel values in median dark frames with exposure times of 0.01, 1, 5, and 30 seconds.

To see more clearly the tiny increase in pixel value in the 30-second images, I've shifted to a logarithmic scale and zoomed in for the grap below:
For many purposes, one could use a single median dark frame for all short-exposure images.
A median of dome flat exposures shows the expected vignetting and dust donuts.
![]()
However, note one additional "feature": there are faint vertical lines or bands throughout the flatfield image. Hmmmm. These vertical features do appear in the raw images, so they aren't a result of the processing.
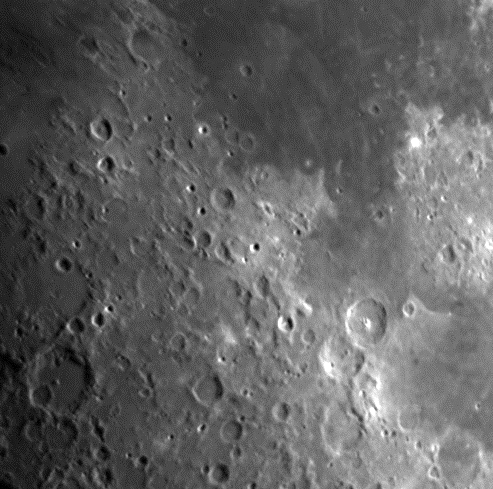
I started with a few pictures of the Moon. Using no filter, an exposure time of 0.01 seconds was pretty good for the first-quarter Moon.

A closeup of the crater Alfraganus (diam 21 km) includes the larger craters Theophilus (100 km) at middle right, and Albategnius (136 km) at lower left. I've applied a mild unsharp mask to this image.
I took two sets of images of the open cluster M67, one with 5-second exposures, the other with 30-second exposures.

One can use the stars in the dipper asterism to calibrate one's photometry, though without filters, there isn't much to do there. My main interest in this field was to determine the plate scale. Comparing instrumental positions of the stars to positions from Gaia EDR3 , I found
The full field is thus roughly 41 x 27 arcminutes in size.
I collected 10 images each at an exposure time of 5 seconds, and at an exposure time of 30 seconds. In order to get a rough idea of the quality of the images, I analyzed each set of 10 images separately.
Using aperture photometry with a radius of 7 pixels in the clear filter (binned 4x4, each pixel is 1.04 arcsec, so a radius of 7.28 arcsec), I measured the instrumental magnitudes of a number of reference stars and the target. Following the procedures outlined by Kent Honeycutt's article on inhomogeneous ensemble photometry, I used all stars available in each image to define a reference frame, and measured each star against this frame.
For the 5-second images, sigma-vs-mag plots show that the floor was about 0.008 mag,
![]()
while for the 30-second images, it was about 0.005 mag.
![]()
I estimate ROUGHLY the scatter of the relative photometry to rise in the following manner.
                      unfiltered,
                      calib to
    exposure time         V mag        scatter (mag)
 --------------------------------------------------------
        5 sec            13.0             0.02
        5 sec            14.0             0.05

       30 sec            14.0             0.02
       30 sec            15.0             0.05
 --------------------------------------------------------
Note that the first-quarter Moon was only about 12 degrees from this field when the images were taken, so the sky was brighter than normal.
Finally, I took some images of M51, just for fun. Below is a median stack of ten images, each a 30-second exposure.
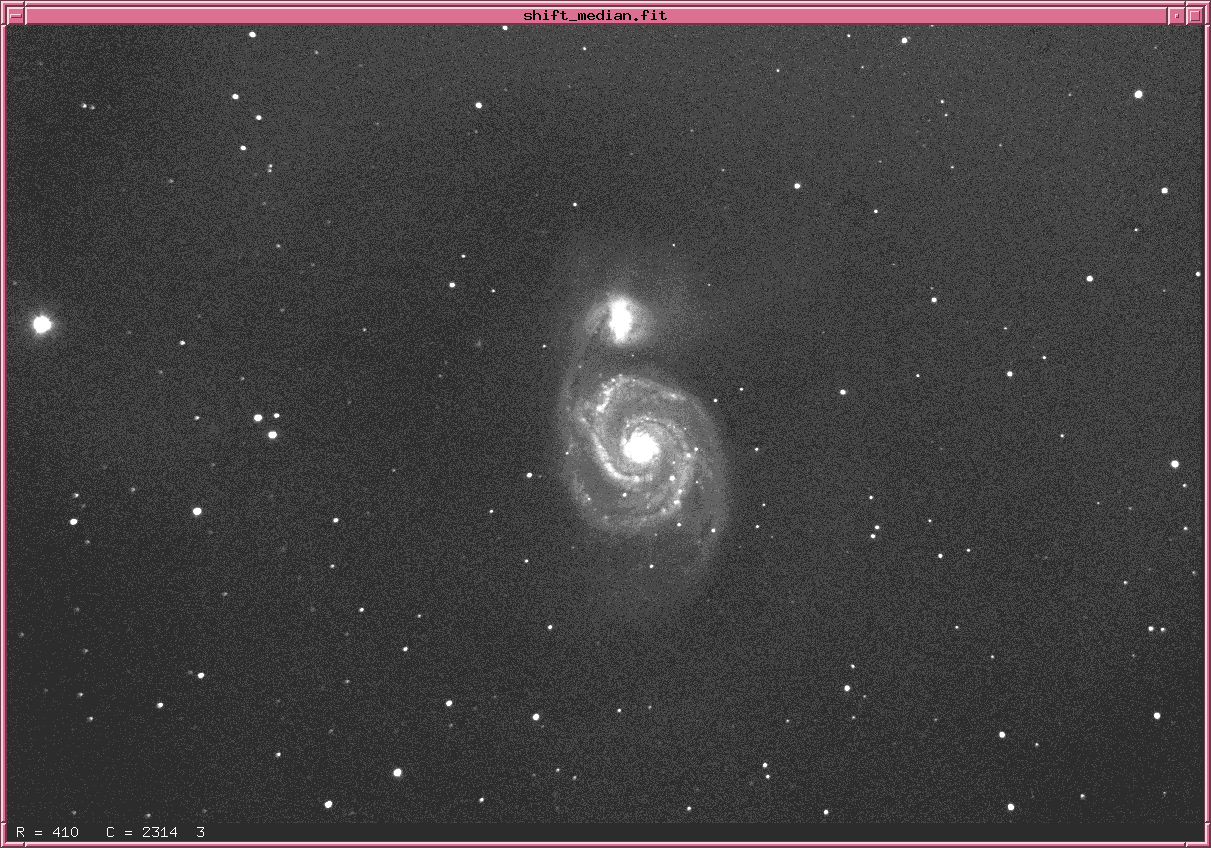
In this unfiltered image of total exposure time 300 seconds, one can see easily stars down to magnitude eighteen or so.
Last modified 5/09/2022 by MWR.