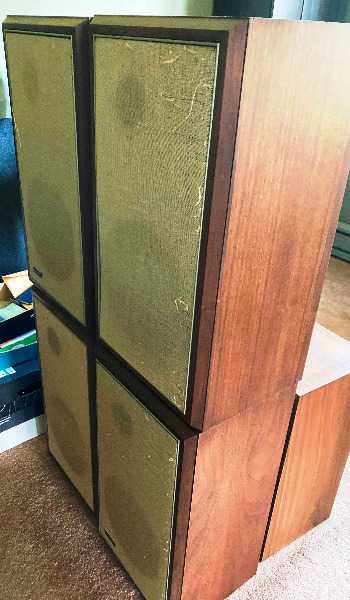
On June 14, I noticed a post in our local Freecycle bulletin board which advertised two pairs of Original Large Advent speakers!
Four original Advent speakers, circa 1980s. Woofers need to be re-coned; they will not work unless this is done! Approximately 14"w x 25.5"h x 11"d. Walnut veneer. The only reason I'm not fixing them and keeping them is because I don't have space for them.The photo below accompanied it.

After a bit of back-and-forth with the owner, I established that the units only needed re-FOAMING, not re-coning. Phew. I jumped at the chance to pick them up.
Here's what they looked like when I brought them back (click on the picture to enlarge):
The two pairs are slightly different vintages, as shown by the grill (or lack thereof) over the tweeter. The pair without the grill was slightly older, made in 1971,
while the pair with the grill came out of the factory two years later, in 1973.
All the woofers needed to be re-foamed. So, I purchased kits from Simply Speakers and started to prepare while waiting for the new foam surrounds to arrive. On the backs of each cabinet were the original instructions and documentation, as you can see in this example.
The serial numbers (on cabinets) and dates (from woofers) are
In order to replace the foam in each woofer, I had to remove it from the cabinet. The older set had green wire to the positive connector (on the left) of the woofer and black wire to negative; there was also a red "X" in marker on the basket next to the positive terminal. These wires were soldered to the terminals, so I had to use a soldering iron to loosen them enough to be pulled free.
I was happy to see that on the newer set of woofers, spade connectors joined the wires to the terminals. Phew! In this case, the positive wire was colored red (not green), but the negative wire was still black. One of the two baskets (A 92375) featured a black stripe placed next to the positive terminal, while the other (A 92409) had no marks on the basket.
It's a pretty simple process. At the start, there are still some bits of the old foam sticking to the cones.
So, the first step is to remove all of the old foam scraps, both from the top of the cone and the underside of the masonite ring.
When the new foam surrounds have arrived ...
... one first smears glue along the rim of the cone ...
... and then places the new foam gently in place.
After the glue has cured, one must smear glue along the top surface of the outer edge of the foam, then lower it under the masonite ring and hold it there until the glue starts to cure.
I replaced the foam on all four woofers without any incident.
I decided to look at the crossovers inside the speakers, both in order to check their nature (there were several versions in OLAs), and in order to see if the capacitors might have gone bad. A good reference for Large Advent crossovers is
Inside the "A" pair (made in 1973), the crossovers feature
which indicates that they are the "Rev 1" version of the crossover.
Inside the older (1971) cabinets, the capacitors are a different brand and color, but again 16 μF.
I attempted to test the capacitors in situ, without cutting any wires, using a capacitance meter from the physics labs. Although I tried measuring both capacitors in each cabinet, I discovered that only one would give a meaningful reading in each case; my guess is that the circuitry prevented one from properly reading with the meter.
   Cabinet                lower or left capacitor (μF)
-------------------------------------------------------------------
    16077                       16.19
    17144                       16.99

    A 92409                     18.20
    A 92375                     17.67
-------------------------------------------------------------------
Hmmm. The capacitors in the newer cabinets appear to have drifted a bit to higher values, but I decided that the difference isn't significant enough to warrant replacing them. Perhaps I'll change my mind later.
As a bit of history will show, Henry Kloss designed these speakers so that the air trapped within the cabinets would act as an extra "spring" to help the cones return to their equilibrium position. In order to achieve the best sound quality, one must make the cabinets airtight. Therefore, before replacing the woofers in the cabinets, I applied strands of Mortite caulking cord around the edges of the enclosures. (I scraped the remnants of the old sealant material first).
The cabinets were in good shape cosmetically, so they didn't need any real refinishing. I followed a simple two-step procedure to clean them up.
First, I applied one coat of Howard's Restor-A-Finish to the exterior faces of each cabinet, using a piece of steel wool. I allowed faces to dry for at least 24 hours before turning them over to do the other faces, but I noticed that some spots were still a bit wet; well, not "wet", but moist enough to leave a bit of residue on my hands if I touched them.
Second, I applied one coat of Howard's Feed-n-Wax to the exterior faces.
The result looks pretty nice to my inexpert eye.
The fabric grilles covering the front of each speaker are clean, but a bit ratty; there are some loose threads and a few spots with small holes. I guess I could try to build some replacements with new fabric ....