 Copyright © Michael Richmond.
This work is licensed under a Creative Commons License.
Copyright © Michael Richmond.
This work is licensed under a Creative Commons License.
The plan today is for you to use the Windows machines in the Gosnell lab to connect to the computer iceberg.rit.edu, which contains some image processing programs. We'll use these programs to analyze data gathered at the RIT Observatory. The first step is for you to learn how to connect to this machine:
Once you have connected to iceberg, how can you work with astronomical images? The enhanced goals of today's session are
If we run out of time, we'll continue on Monday.
Sit down at one of the Gosnell Windows classroom machines and log in. You should see a desktop like this:

One of the icons on the desktop is labelled "Cygwin 256":
![]()
Double-click on this icon. It should cause the screen to flash black momentarily -- don't worry! -- and then come back with a new text window:

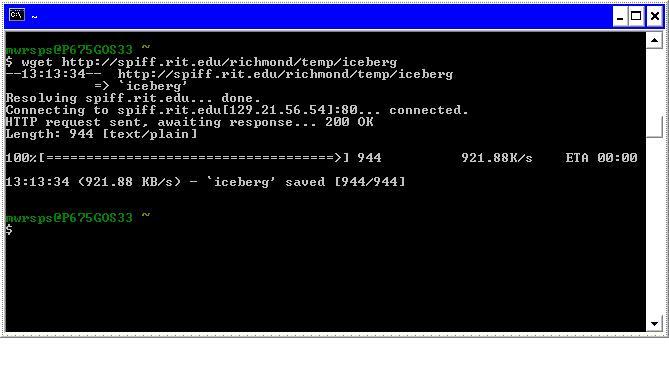
Type the following magic incantation into this window:
wget http://spiff.rit.edu/richmond/temp/iceberg
and watch as your computer grabs a small file called "iceberg"
from the Internet
and copies it onto its own hard drive.
Now you can connect to the remote machine by typing
sh iceberg
That will cause the screen to go black again,
momentarily, and then re-appear with several windows on a curiously
bland grey background, like this:
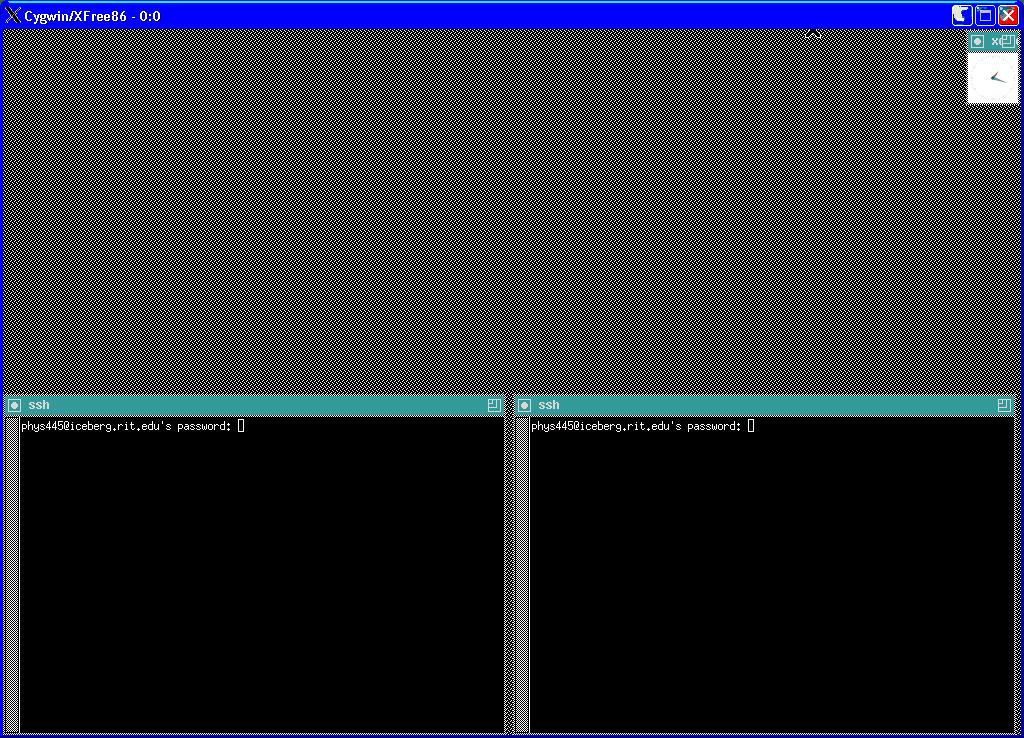
You will need to provide the password for the "phys445" account -- ask the instructor.
Each of the windows will prompt you to answer a couple of questions:

(the answer to this one is "y", of course)

Type the two-digit number of your computer in the Gosnell lab; if your machine is gos24, for example, then type
24
The computer should print a cryptic comment about "display", then give you the standard Unix-style prompt:

Answer the questions in both of the windows.
When you have reached this point, please pause, and look around. If someone nearby is having problems, please help him or her to reach this point.
The iceberg computer runs an operating system called "Linux," which is a member of the Unix family. It has a hierachical structure of directories. All students are logged in as the user called "phys445". Inside phys445's home directory, each student has a subdirectory of its own:
When you first connect to iceberg, you will be in the home directory of the "phys445" user. The prompt should look like this:

The last portion of the prompt is the name of the directory in which you are currently working. If you change to another directory, say, dyer, by typing
cd dyer
you'll see the prompt change:

In general, you will do all your own work inside the subdirectory with your own name. It is a very bad idea for you to play around with material in any other student's directory.
The command
ls
prints a list of files and sub-directories on the screen.
By default, it lists the contents of the current directory,
You can print out the contents of another directory(s) by typing its name as the argument(s) to the "ls" command:
ls sep24_2003

The data files we'll analyze are in sub-directories under phys445's home directory; each night's data is in a directory named after the date. For example, images take on Sep 24, 2003, are in a sub-directory called sep24_2003.
To copy a file from one directory to another, use the cp command. Here's how to copy one particular image to your own subdirectory:
You can use wildcard characters to specify a bunch of files at once:
Or even more powerful wildcards to copy ALL the files in one directory into another:
The point is, if you make a copy of an image in your own directory, you can modify, edit, or delete the image. You can always go back to retrieve another copy of the original without worrying about errors you might have introduced via improper processing. I would like each student to do all of its work in its own sub-directory.
Exercise:
- Copy all the raw images in the sep24_2003 directory into your own directory.
When you reach this point, please pause and look around. If somone nearby is having problems, please help him or her.
Okay, you have the copy in your own sub-directory. Now what? I have written a set of programs for processing astronomical images, called the XVista package. These programs aren't user-friendly, and lack a GUI. You'll have to type the commands by hand -- horrors! Of course, if you want to put together a script of your own commands, you can then run it repeatedly on images ... without having to sit in front of the computer and click mouse buttons.
There is some information available on-line for each XVista command via the man command. For example, for help on the tv command, just type
man tv
To see more of the man page, type the spacebar. To quit reading the man page, type the "q" key.
You can see a list of the XVista commands and a very brief description of each with
man xvista
If you prefer, you can read this list of commands in HTML format.
So, let's start with two XVista commands.
Astronomical images in the FITS format have two components: a header, containing human-readable information about the image, and a data section. You can print out the header of an image with the buffers command.
If information scrolls off the top of your xterm window, use the scrollbar to look back at it.
If your terminal doesn't have a scrollbar, you can create one:
- move the cursor into the xterm window
- press and hold down the "Control" key
- press and hold the middle mouse key (press down on the wheel)
- slide the mouse to highlight the Enable Scrollbar item
- release the mouse buttons
You can use the scrollbar to review text which has scrolled off the top of the window. Place the cursor into the scrollbar region, then press the middle key (wheel) and move the mouse.
Exercise:
- At what time did we acquire the "warm" 1-second dark frames?
- At what time did we acquire the "cold" 1-second dark frame?
- How many pixels high is each image? How many pixels wide?
When you reach this point, please pause and look around. If somone nearby is having problems, please help him or her.
The tv command is a workhorse: it displays a FITS image in a new window, and also allows you to do look at individual pixel values, zoom in, zoom out, and make several types of measurement.
The simplest way to use it is like so:
tv dark1-001d.fit
which should pop up a new window to display the image:
If you receive an error message like this:read_property: XGetWindowProperty returns wrong number of itemsthen you need to typepropinitand then try tv again.
You can control the contrast and base level of the displayed image with command-line options to the tv command.
tv dark1-001d.fit z=2650 l=1000
where
tv dark1-001d.fit z=200 l=100
Next, displayed via
tv dark1-001d.fit z=200 l=1000
You can also use the invert option to switch from white-stars-on-black to the reverse:
tv dark1-001d.fit z=200 l=500 invert

After you specify invert, all subsequent displays will show the same scheme (black on white) until you explicitly type invert again.
Exercises: Display an image, and find out what all the following things do. Write down the answers to each.
- Moving the cursor within the image window.
- Clicking the left mouse button.
- Clicking the middle mouse button (wheel) holding it, and moving the mouse
- Clicking the right mouse button
- What do the following command-line options to the tv command do?
- zoom=2
- xo=300
- yo=100
When you reach this point, please pause and look around. If somone nearby is having problems, please help him or her.
If you have never used any Linux or Unix system in the past, you may want to read a book or web site which describes the basic shell commands. Here are some possibilities:
Copyright © Michael Richmond.
This work is licensed under a Creative Commons License.