 Copyright © Michael Richmond.
This work is licensed under a Creative Commons License.
Copyright © Michael Richmond.
This work is licensed under a Creative Commons License.
If you read a paper in the technical astronomy journals, you'll often see the phrase "we applied the standard reduction procedure to our images." What does that mean? It means:
Let's look at these two operations in more detail, to see how one can perform them with the XVIsta image processing package. After that, we'll walk through the process of creating the "master" dark frame and "master" flatfield frame that are used in the cleaning procedure.
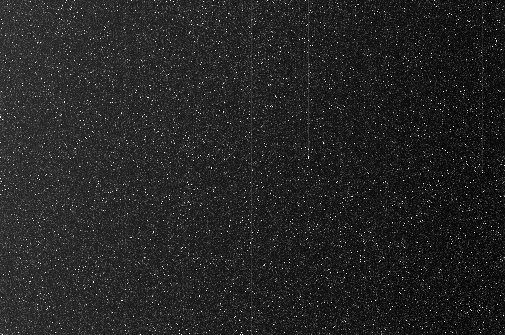
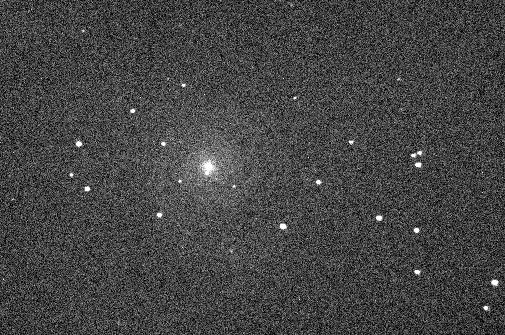
I took images of the galaxy M74 (and SN 2013ej) with the RIT Observatory's 12-inch telescope on UT 2014 Oct 02; you can read about the details if you want. Let's look at one particular image, a 30-second exposure through the R-band filter.

Ugh. Yes, one can see stars and maybe the faint hint of a spiral galaxy near the center, but it's ugly:
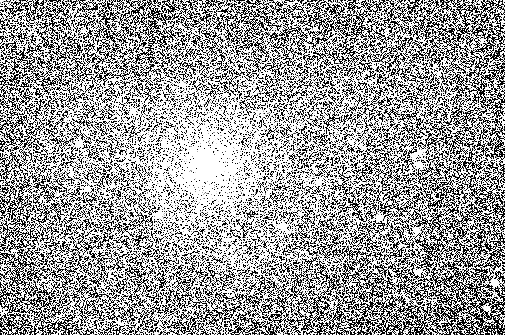
The first step in our cleaning process is to subtract from the raw image a "master" dark frame of the same exposure time. The raw image has a 30-second exposure, so we need a 30-second "master" dark frame.
We'll discuss shortly how to create such a "master" frame. For now, just look at the "master" dark frame:
The bright single pixels are in the same location on both images, because they occur where imperfections in the silicon chip cause large numbers of electrons to be knocked free by thermal motions of the atoms.
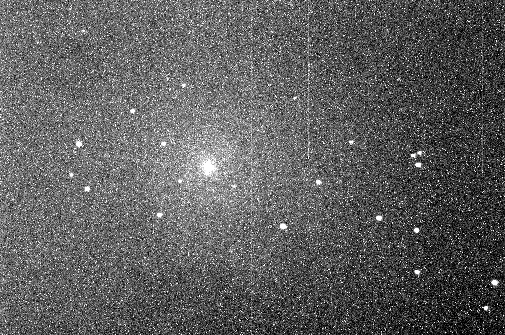
So, if we subtract the "master" dark frame from the raw image
sub raw.fit master_dark30.fit outfile=temp.fit
we are left with a much nicer looking image:
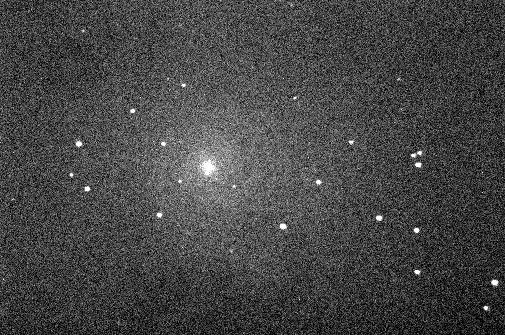
Although our image is certainly better than the raw version, it still has problems. Here's another view of the dark-subtracted image, at a harder stretch:
Notice the gradient -- it grows darker toward the lower-right corner. In addition, there are faint round features near the bottom and top-left corner.
What's happening is that we are seeing imperfections created by
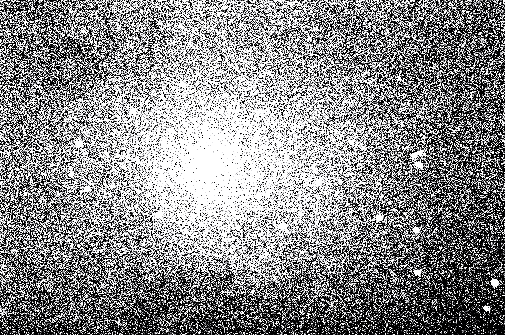
For example, if I take a picture of a blank white sheet of cardboard, I get a picture like this:
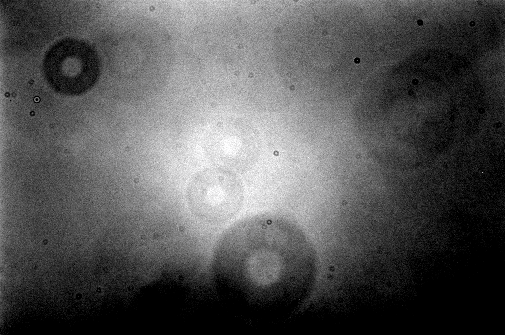
You see the same general features. We call this a flatfield image, since it shows the defects in what should be a "flat," featureless picture.

We can remove these features by dividing the dark-subtracted image by a "master" flatfield image. Where the flatfield image was bright, we'll divide by a big number, and so push the result down; where the flatfield image was faint, we'll divide by a small number, and so push the result back up.
div temp.fit flatr.fit flat outfile=clean.fit
Now the background is (more) uniform, and the "dust donuts" have disappeared.
This "clean" version of our CCD image is now ready to be measured.
Copyright © Michael Richmond.
This work is licensed under a Creative Commons License.