
Your main task in this experiment is to build a Michelson interferometer. You will then use your interferometer to measure a very small change in the length of a copper rod, and derive the expansion coefficient of copper.
In this lab, you will have to figure some things out for yourself. As you manipulate objects on the optics bench, please
DO NOT TOUCH ANY OPTICAL SURFACES WITH YOUR HANDS!
The Michelson interferometer is simple: a single beam of coherent light is split into two beams, which travel in perpendicular directions. Each beam bounces off a mirror and returns to the splitting device, which then serves to combine the beams. The combined beams fall on a screen or detector of some sort. If all the optics are properly aligned, one should see fringes at the position of the detector, due to the interference of waves in the two beams.
The waves meeting at the detector will interfere constructively if the difference in distance travelled along each leg is an integer multiple of the wavelength. On the other hand, if the waves are out of phase by half a wavelength, then the interference will yield a dark spot.
Use the optical elements you find on the optics bench to create a Michelson interferometer. To turn on the laser, move the switch at upper left corner of control console to "HeNe Laser"; it will take about 5 seconds for the light to appear. You must satisfy the following constraints:
When you have finished, you should be able to show the instructor fringes on the western wall of the room, like this:

If your combined beams don't create a nice, symmetric, compact pattern of light on the wall, it means that you need to improve the alignment of the two beams. You can use the knobs on the back of the two mirrors to make these adjustments.
DO NOT TOUCH ANY OPTICAL SURFACES WITH YOUR HANDS!
Congratulations! You have achieved the first of your two goals -- building an interferometer.
Your second goal today is to measure the change in the length of a small copper rod as it heats up. If you can measure its expansion precisely enough, you can compute the expansion coefficient of copper.
In order to measure the fringes quantitatively, you need to use a photodiode (also called a "photodetector"). Connect the photodiode's power cord to one of the three "Detector Power" jacks on the front of the "Modern Interferometry" console. Make sure the photodetector is set to the 20k setting. Connect the photodiode's output to the oscilloscope. Use the "DC" setting on the oscilloscope and set it to cover the range from +8 to -8 volts. When the interfering laser beams shine on the detector, you should be able to measure a signal which is a few volts in size and negative.
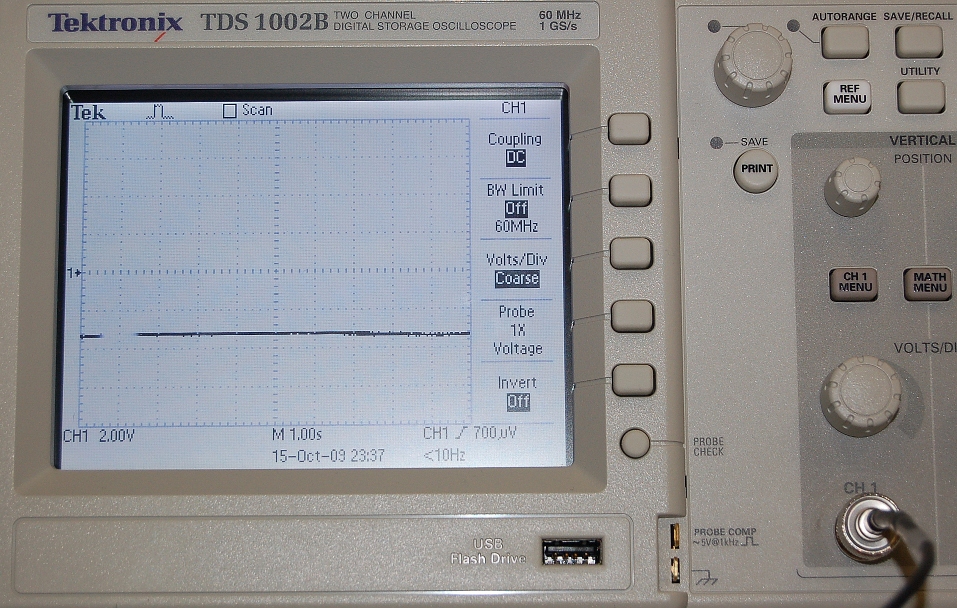
If you tap gently on the table, you should see the signal from the photodiode wiggle up and down rapidly: the vibrations are causing the fringes to move across the detector. You might zoom in on the display a bit.
The copper rod is hooked up to two sets of wires. One set is connected to a thermocouple soldered to the rod. You need to connect that thermocouple to a thermometer. The other set is connected to some heating coils wrapped around the rod. By sending current through these wires, you'll heat the rod and cause it to expand.
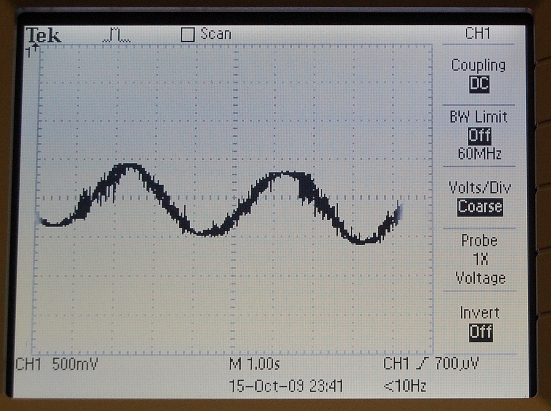
Make sure that everything is connected properly, and that the oscilloscope is displaying the signal from the photodiode. Then send about 1 amp of current through the heating wires. You should see the signal from the photodiode start to oscillate with a period of a few seconds. As the rod expands, it causes one leg of the interferometer to grow longer. As the leg changes its length, its light waves fall in and out of phase with waves from the other, fixed-length leg. The changing interference pattern appears as moving fringes, or as a variation in the overall intensity of the light striking the photodiode.
If you count the fringes, you can figure out how much longer (or shorter) the light waves had had to travel, and therefore how much longer (or shorter) the copper rod must be. The relationship between fringes passing by and the change in the length of the rod is a little tricky; you ought to draw some diagrams to help you get it right.
Starting with the rod at room temperature and at rest, send a current through the heating wires. Make a table showing the temperature of the rod at intervals of 10 fringes. Continue your measurements until you have counted at least 50 or 60 fringes. As you watch, the fringes will pass more and more slowly. Why does the speed of the fringe pattern change?
Use your table to determine the change in the length of the rod as a function of change in temperature. Make a graph, and measure its slope and the uncertainty in its slope. You can use those values to calculate the expansion coefficient of copper, alpha, defined in the following way:
You will need to know the wavelenght of the laser light. See Bonus item 1 below.
Compare your value of the expansion coefficient to the known value. Does your value agree with the known value to within your estimate uncertainty?
Do this only if you have time.
Determine the wavelength of the laser light yourself. Shine the laser light through a diffration grating at a wall. Tape a piece of paper to the wall and mark the location of spots on the paper. Use diffraction theory and your measurements to determine the wavelength of the laser light and its uncertainty.
If you don't have time, ask the instructor.